Halloween Rice Krispie Treats
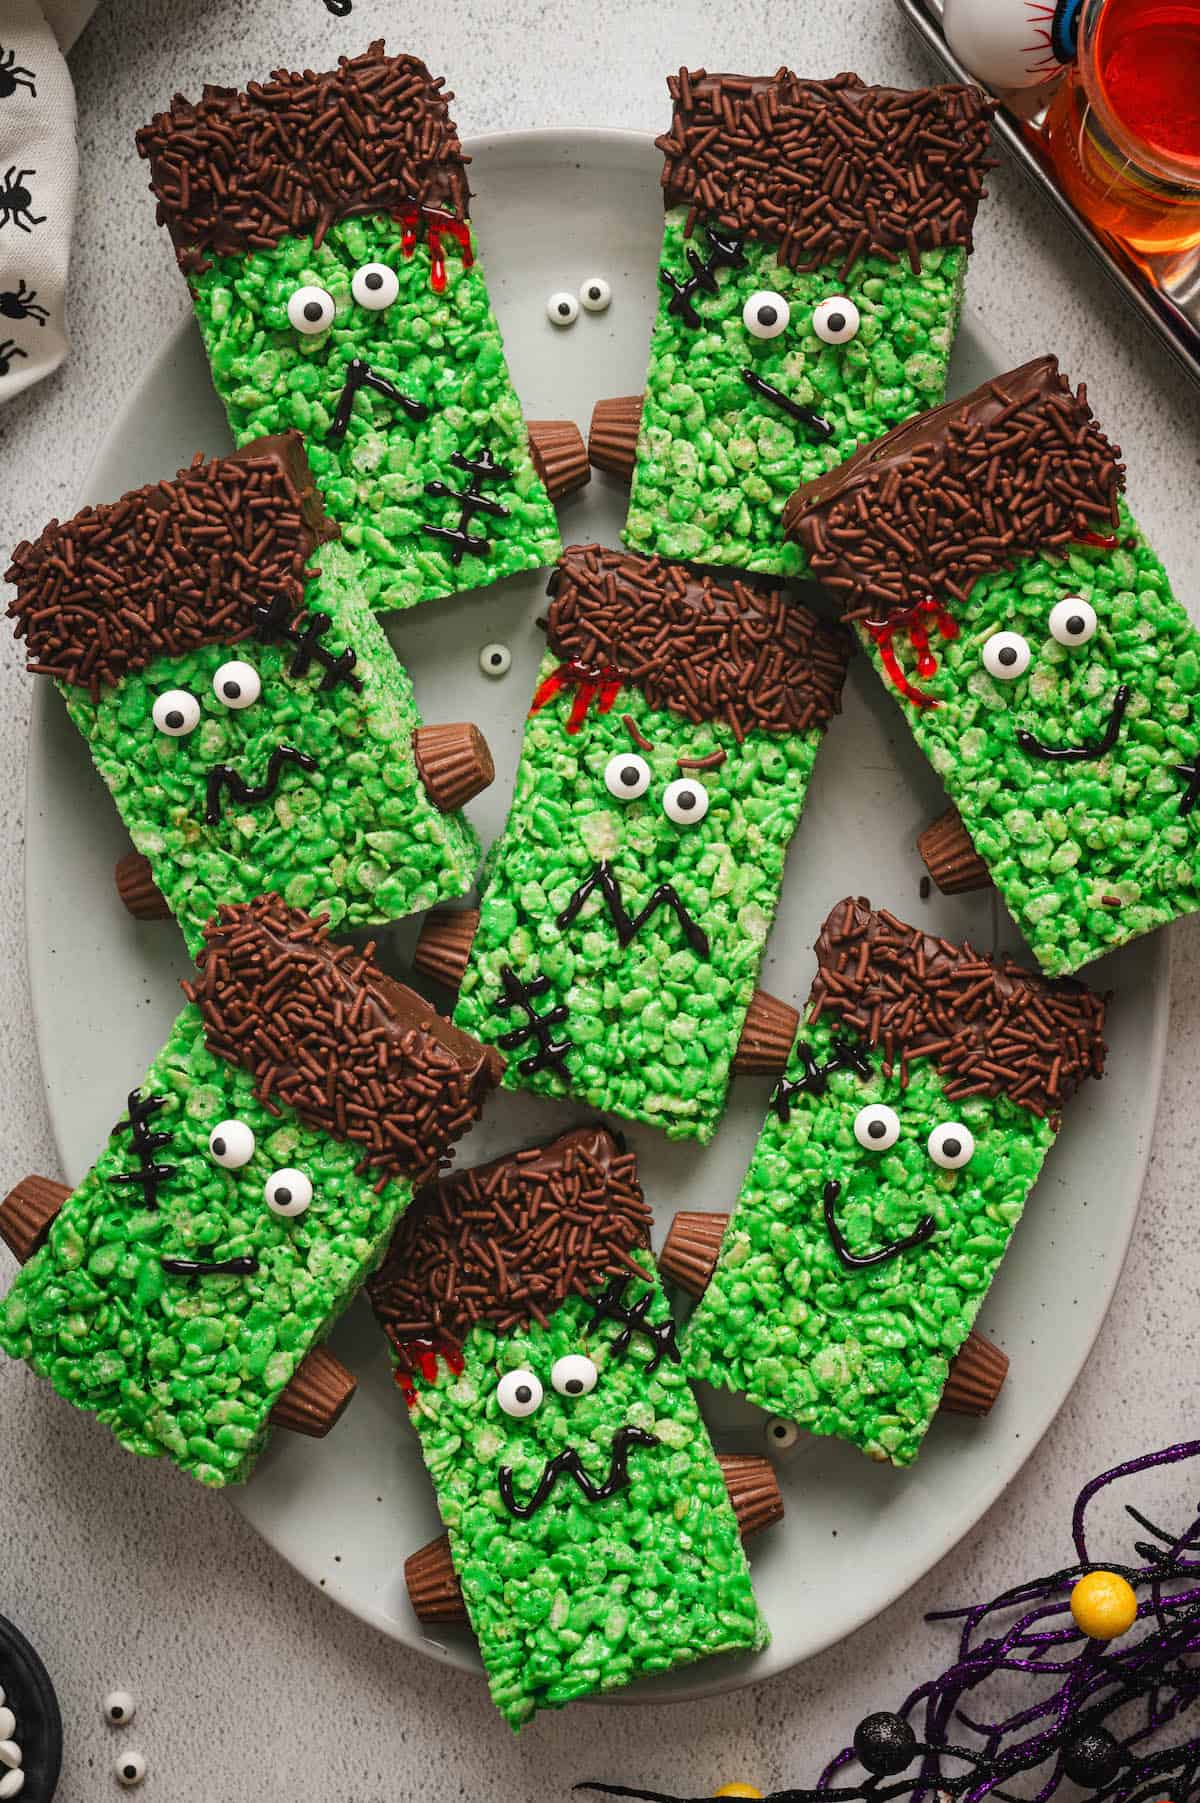
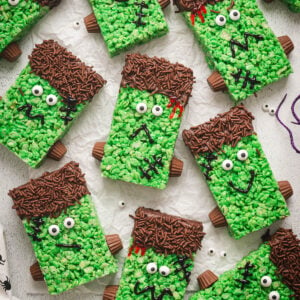
Our adorable Halloween Rice Krispie Treats will have all the kids (and adults) reaching for seconds! With a fun chocolate dip and sprinkles for “hair,” they are spooky and the perfect way to Frankenstein your Halloween party!
Save This Recipe!
Cute Monster Halloween Rice Krispie Treats Everyone Will Love!
When it comes to creating the Halloween food we’ve come to be known for, our goal is always to make things that TASTE as good as they look.
This seems obvious, but it’s not always the case with themed food recipes you’ll find online. A lot of them are designed to LOOK really cute (or creepy), but the flavor was clearly an afterthought.
What sets this Halloween Rice Krispie Treats recipe apart is our attention to FLAVOR detail, down to a few grains of salt. Yes, a pinch of salt balances the sweetness of the marshmallows and creates a more nuanced flavor.
The taste and texture of these adorable treats will make them a standout addition to your spooky celebration.
Why You’ll Love These Halloween Rice Krispies Treats
- They’re easy enough to make that it’s no sweat getting the kids involved for some Halloween fun in the kitchen. They’ll love creating their own Frankenstein faces. No piping bag needed!
- Rice Krispies treats are great for making ahead of time, so you can prepare them the day before a Halloween party and know that they’ll be ready to go.
- Adding a pinch of salt to the mixture balances the sweetness and creates an even better-tasting RKT!

Frankenstein Rice Krispie Treats Ingredients
This section contains affiliate links. A full recipe card, including exact ingredient amounts, appears at the bottom of this post.
- unsalted butter – used to help melt the marshmallows for this sticky dessert.
- mini marshmallows – these provide the signature stickiness for these Frankenstein rice krispies treats.
- Rice Krispies cereal – the classic choice for that crispy texture. Use generic “crispy rice cereal” at your own risk. We go with name-brand all the way here!
- kosher salt – not traditional in all RTK recipes, but we like to add a pinch of salt to ours to balance the sweetness in a really nice way.
- green food coloring – for the Frankenstein look, for these Rice Krispie Halloween treats! You can use liquid or gel coloring. More info on this under “Home Chef Tips.”
- chocolate chips – we’ll be melting these to create the sticky base for Frankenstein’s “hair.”
- chocolate sprinkles – sprinkling these over the chocolate completes the hair look. You can also melt candy melts for this, but we think the flavor of chocolate chips is much better.
- candy eyeballs – these bring your monsters to life!
- mini peanut butter cups – for the neck bolts on the monster. Look for a bag of Reese’s Minis Unwrapped.
- black writing gel – for making the monster mouths and drawing on some stitches.
- red writing gel – an optional addition to add some “blood” as decoration on these Halloween themed rice krispie treats. Writing gels should be available in the baking aisle of your local grocery store.
How to Make This Rice Krispie Halloween Treats Recipe

- MELT. In a large pot, melt the butter, then add the marshmallows, salt and enough food coloring to make everything bright green. Stir until smooth, then assess the color and add more food coloring if needed.

- CEREAL. Remove the marshmallow mixture from the heat, then add the Rice Krispies and stir until the cereal is fully coated in the marshmallow mixture.

- PRESS. Pour the mixture into a baking pan greased with cooking spray, then press using a piece of parchment paper to flatten the mixture into the pan. Let stand at room temperature for 15 minutes to cool.

- CUT. Turn the treats out onto a cutting board and cut rectangle in half lengthwise. Then, cut each half into 5 pieces crosswise.

- DIP. Melt the chocolate chips in the microwave (in a microwave safe bowl) until smooth. Dip one end of each treat in the melted chocolate and place on parchment paper.

- SPRINKLE. Immediately after dunking in chocolate, cover the chocolate with sprinkles.

- FINISH. Use the remaining melted chocolate to attach the candy eyes and mini peanut butter cups as neck bolts for the Frankenstein rice krispie treats. Use black writing gel to pipe on mouths and stitches, and red writing gel to add a bit of “blood,” if desired.
Halloween Themed Rice Krispie Treats Home Chef Tips
- Make sure your marshmallows are fresh! A brand new bag, if possible. This is key to a perfect texture in Halloween rice krispies treats.
- We do not provide exact measurements for the green food coloring because there are so many different varieties of food coloring available these days (classic liquid food coloring, squeeze gel, gel in little tubs, oil-based dyes, etc.). Add as much as you need to make a vibrant green color.
- Press the cereal mixture firmly into the pan, but don’t press it TOO hard. Packing it too tightly can make your rice krispie Halloween treats recipe really dense and hard.

Halloween Rice Krispie Treats FAQs
Yes, definitely! Rice Krispie treats are one of the best make-ahead desserts because they hold their shape and texture so well. Just make sure you store them in a really airtight container, and keep them at room temperature.
While you technically can use stale marshmallows, it’s really not recommended. Stale marshmallows don’t melt as smoothly as fresh ones, so you might end up with a lumpy texture and hard treats. For best results, use a fresh bag of marshmallows.
To prevent sticking, lightly spray your spatula or spoon (or hands!) with nonstick spray before pressing the mixture into the pan. Or, our favorite trick is to use a piece of parchment or wax paper to press the mixture down. Our hands stay clean!

More Foxes Love Lemons Favorites
Halloween Rice Krispies Treats (Frankenstein’s Monster!)
Save This Recipe!
Ingredients
- Nonstick baking spray
- 4 tablespoons unsalted butter
- 10 ounces mini marshmallows (5-1/2 cups)
- Pinch kosher salt
- Green food coloring
- 5 cups Rice Krispies cereal
- 8 ounces semisweet chocolate chips
- ¼ cup chocolate sprinkles
- 20 candy eyeballs
- 20 Reese’s Minis Unwrapped
- Black writing gel
- Red writing gel (optional)
Instructions
- Spray bottom and sides of 13 x 9-inch pan with baking spray. In large pot, melt butter over medium-low heat.
- Add marshmallows, salt and enough food coloring to make the mixture bright green and stir until full combined and smooth. Assess the color and stir in more food coloring if you need to.
- Remove from heat. Add Rice Krispies and stir until cereal is fully coated in marshmallow mixture.
- Transfer the mixture to prepared pan, using a piece of parchment paper or greased hands to press the mixture against bottom of pan. Let stand at room temperature 15 minutes.
- Turn out onto cutting board and cut rectangle in half lengthwise. Cut each half into 5 pieces crosswise.
- Place chocolate in microwave-safe glass measuring cup or other glass or bowl that the treats will fit into for dunking, and microwave in 30 second intervals until smooth, stirring between each interval.
- Dip one end of each treat in melted chocolate and place on parchment paper. Immediately sprinkle chocolate with sprinkles.
- Use remaining melted chocolate to attach candy eyeballs and mini peanut butter cups as neck bolts.
- Use black writing gel to add mouths and stitches, and red writing gel to add a bit of “blood,” if desired.
