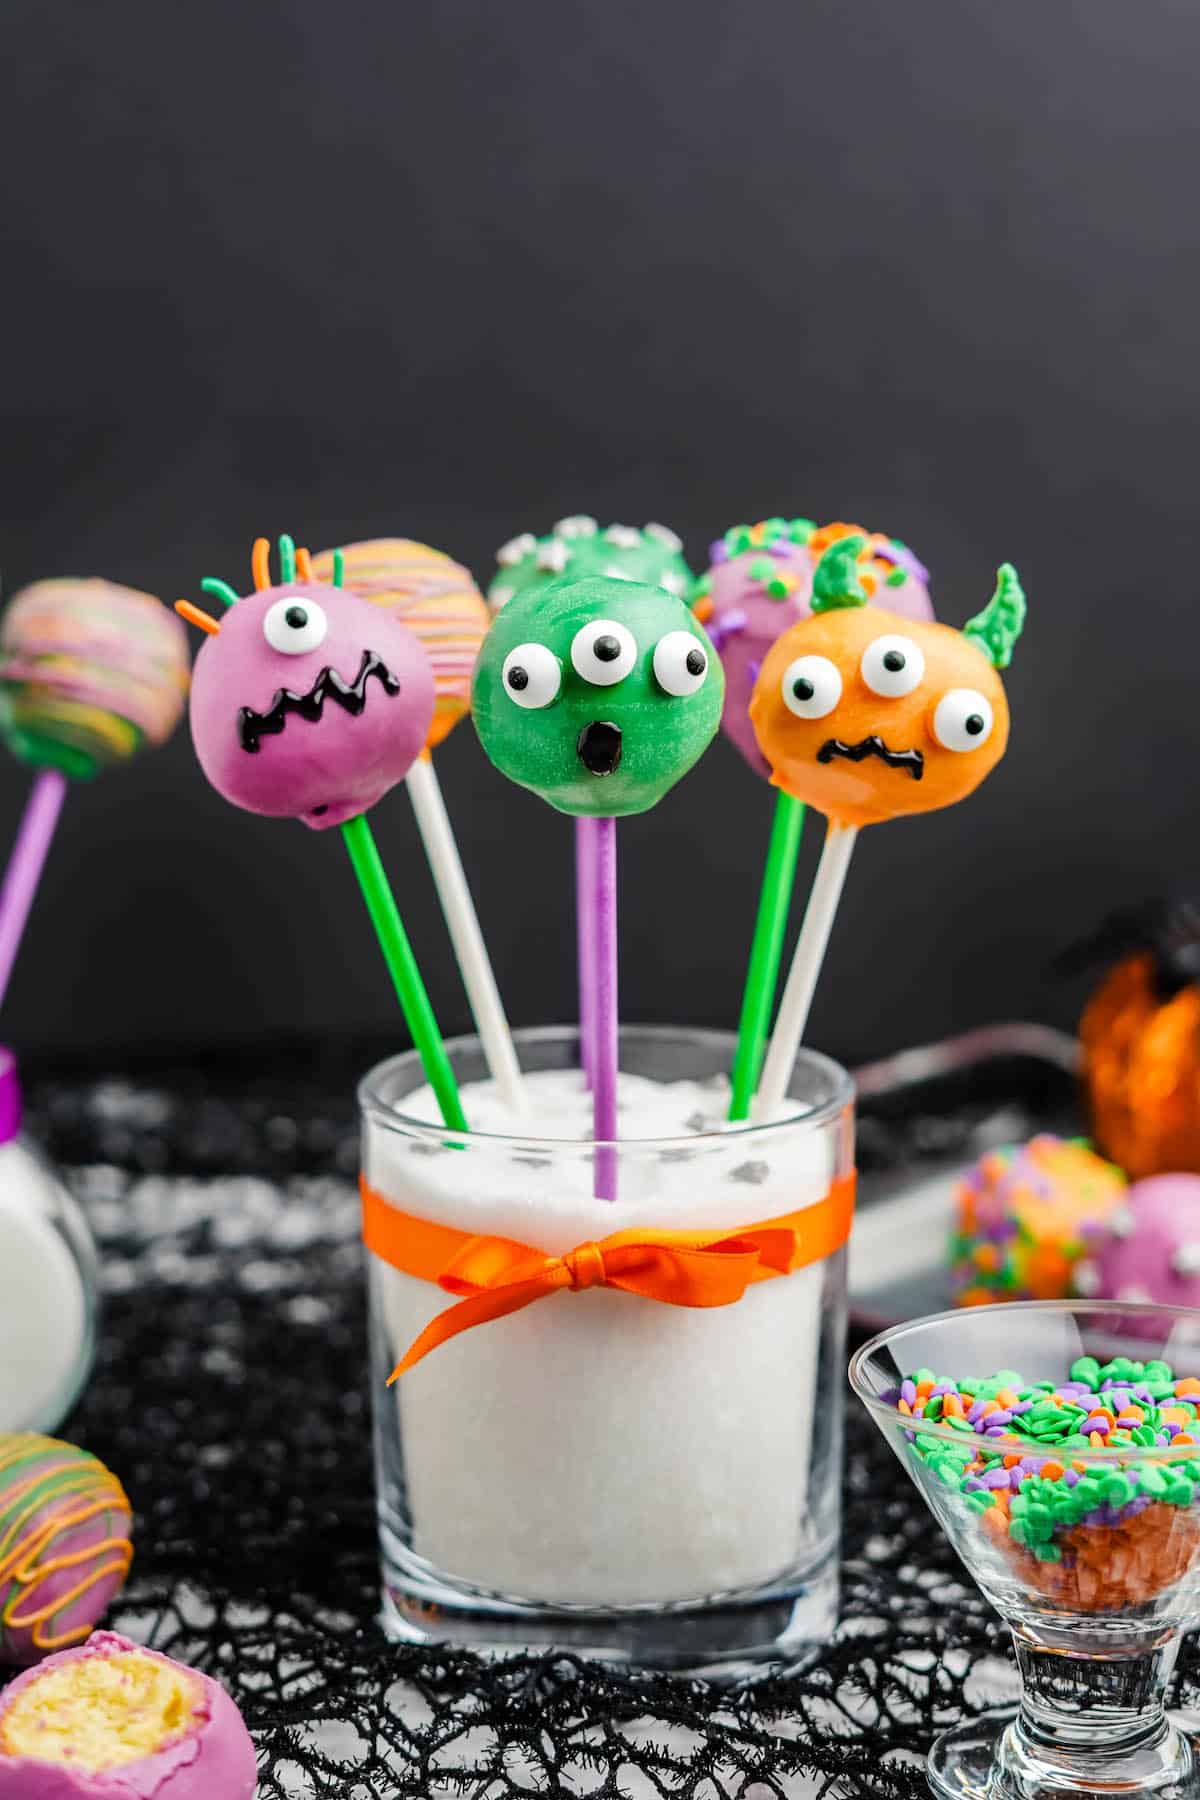
Halloween Cake Pops (Easy Donut Hole Shortcut)
Skip the cake, the crumbling, and the frustration. These Halloween Cake Pops use donut holes for a method that stays on the stick, coats smoothly, and comes together fast.
Save This Recipe!
Easy Halloween Cake Pops That Work Every Time
Traditional cake pops sound fun until you’re halfway through crumbling cake and wondering why you started. Between baking, cooling, mixing, shaping, and chilling, it turns into a full project.
This version cuts straight to the part you care about: decorating cute, festive Halloween cake pops that hold together and look great.
We’re using donut holes as the base, which means no mixing, no guesswork, and no fragile dough falling apart on you. They’re already evenly shaped, sturdy, and ready to go.
You’ll still get that classic coated cake pop look, just with far less effort and a much higher success rate.
Why You’ll Love These Halloween Cake Pop Ideas
- No baking or mixing required. Donut holes replace the entire cake-and-frosting step, saving time and cleanup.
- They stay on the stick. A firmer base means fewer disasters during dipping and decorating.
- They look polished with minimal effort. Smooth coating and simple decorations go a long way here. Kids love to help decorate!
Halloween Cake Pop Ingredients
This section contains affiliate links. A full recipe card, including exact ingredient amounts, appears at the bottom of this post.
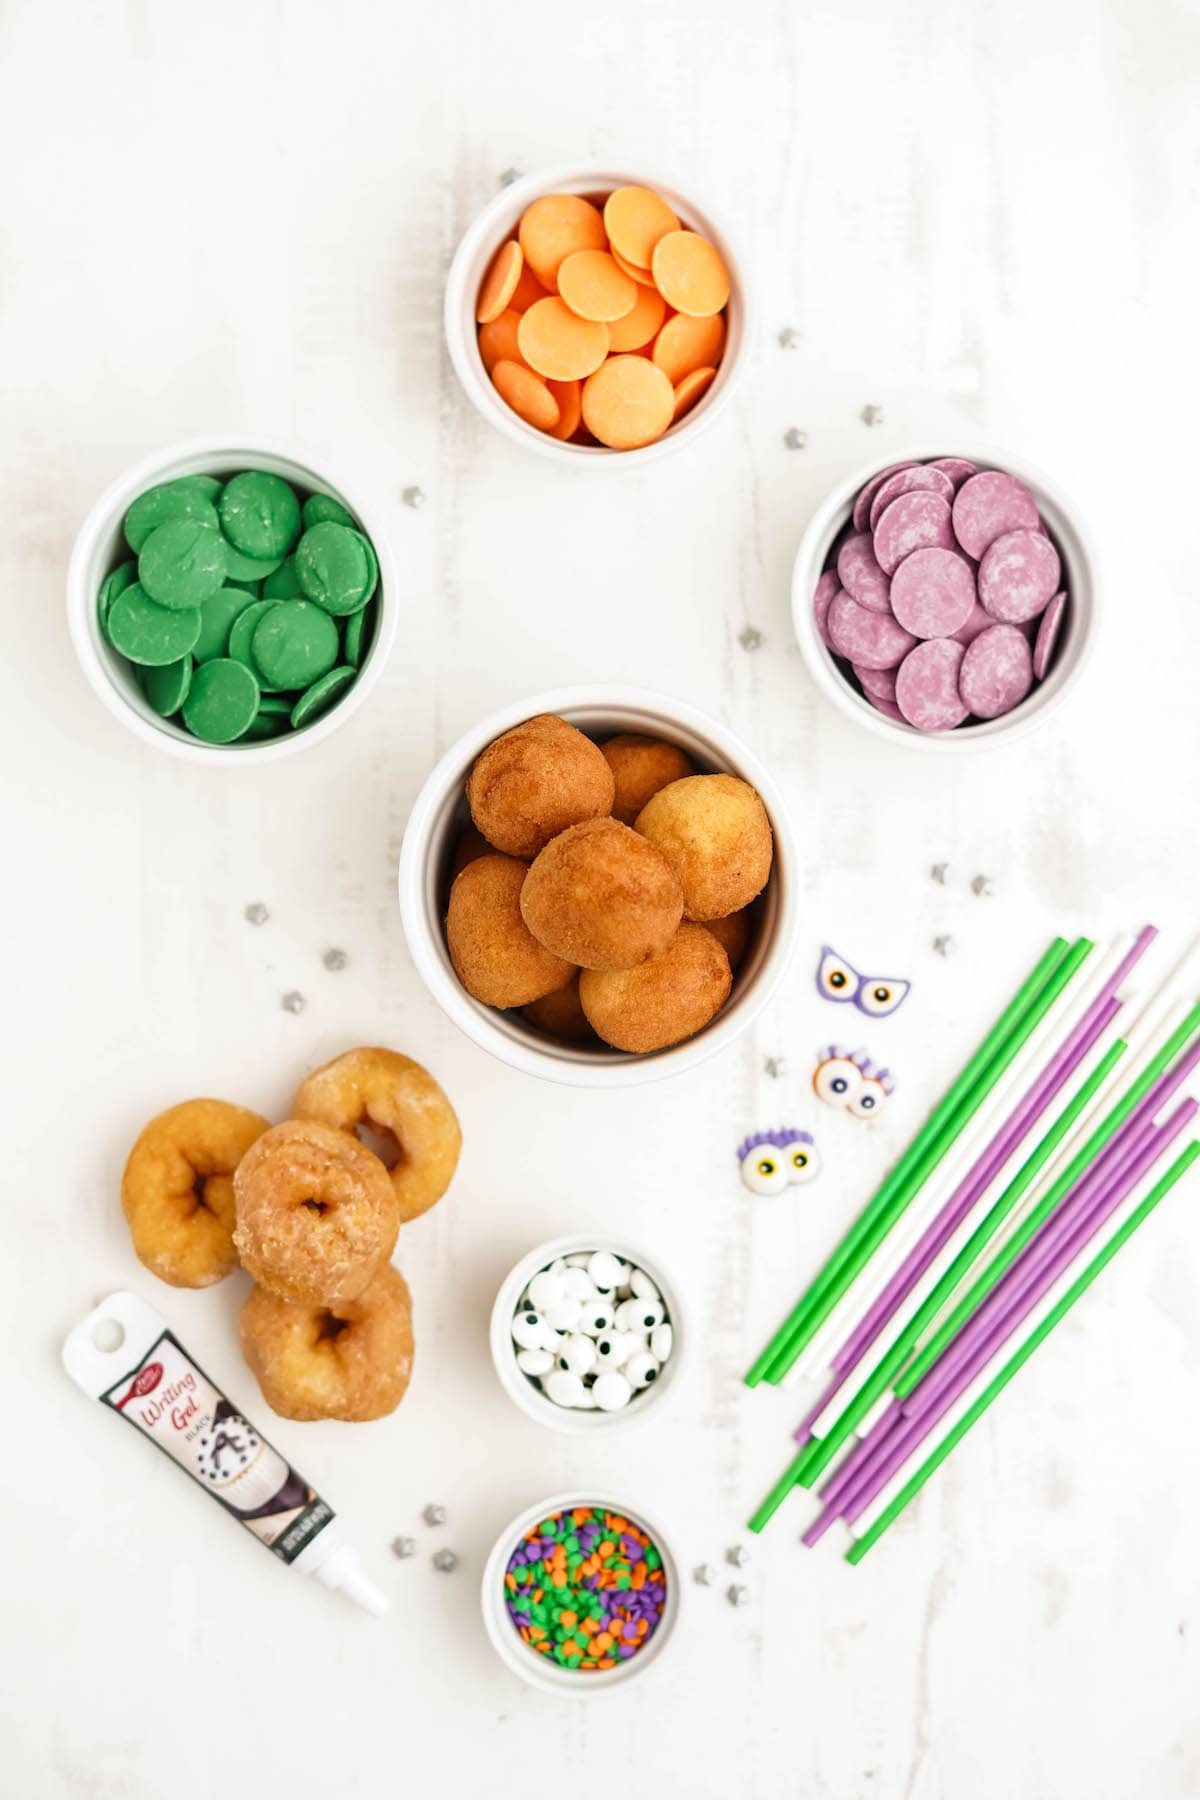
- donut holes or mini donuts – these take the place of cake and frosting. They’re consistent in size and texture, which makes dipping and coating much easier. No cake mix needed!
- candy melts – used for both coating and securing the sticks. They melt smoothly and set quickly without needing tempering. Way easier than melted chocolate or white chocolate. You can use all green candy melts, or a smaller amount of a variety of colors, like a combination of green, purple and orange candy melts. Or white candy melts if you want to do ghosts or mummy cake pops.
- candy eyeballs – it isn’t a Halloween dessert without candy eyeballs.
- assorted sprinkles – add texture and color. You can find fun Halloween sprinkles online and in a ton of stores these days. You can also buy a package of assorted colored sprinkles and just use a few tablespoons of select Halloween-ish colors, like green, orange and purple.
- black food coloring writing gel – for simple faces and details, no piping skills required. We used black decorating gel to make the mouths on this Halloween treat.
- lollipop sticks – 6 to 7-inch sticks are the easiest to work with for dipping and serving. White lollipop sticks and colored lollipop sticks are found online or at craft stores. Popsicle sticks also work in a pinch.
How To Make Halloween Cake Balls
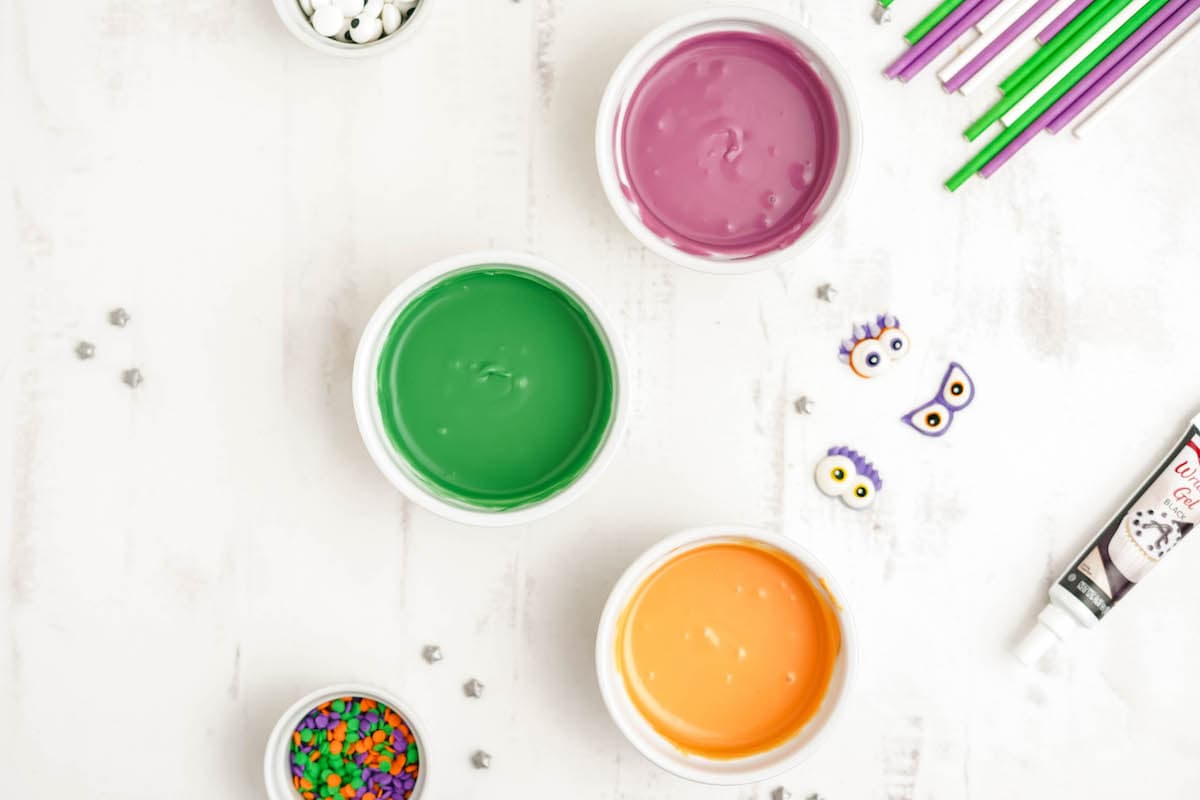
- MELT THE CANDY. Follow the package directions to melt the candy melts (each color in its own ramekin or small bowl). Each brand may vary slightly. We usually use the microwave in 15-second intervals, stirring in between. And not just a quick stir, either. Give it a full minute of mixing. Sometimes those last few lumps just need a little time and patience.
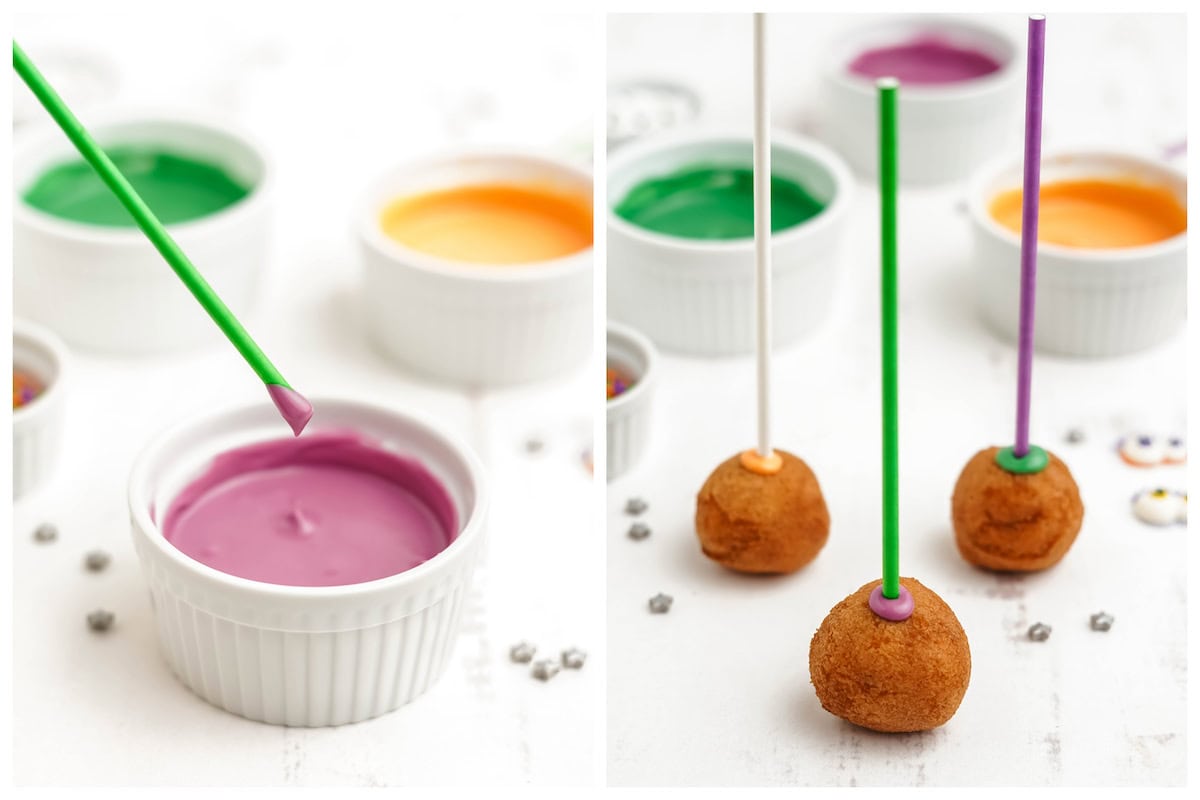
- ATTACH THE STICKS. Dip each lollipop stick about 1/4- to 1/2-inch into the melted candy mixture, then gently insert into a donut hole. Let them rest with the sticks pointing upward on wax or parchment paper until the candy sets. This little trick helps anchor the stick securely in place.
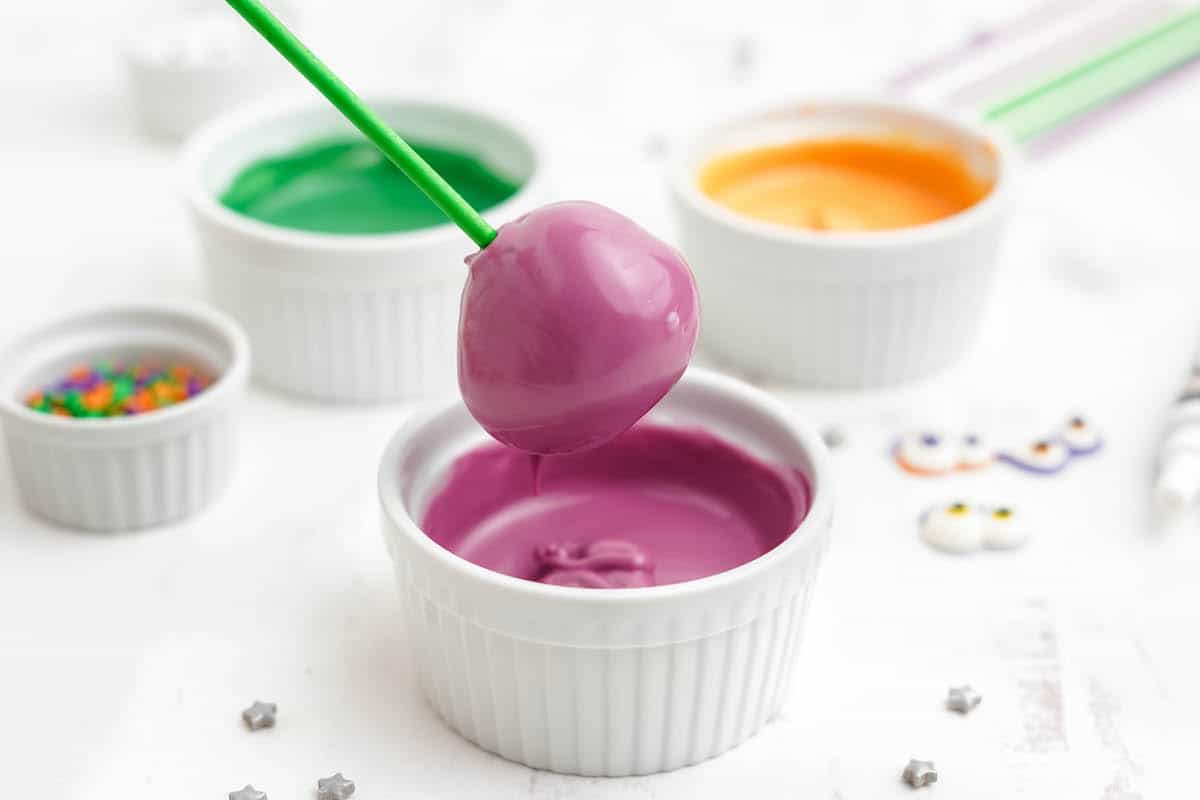
- COAT. Submerge each donut hole into the melted coating, turning to fully cover. Let excess drip off. Place pops upside down on parchment and let coating harden completely.
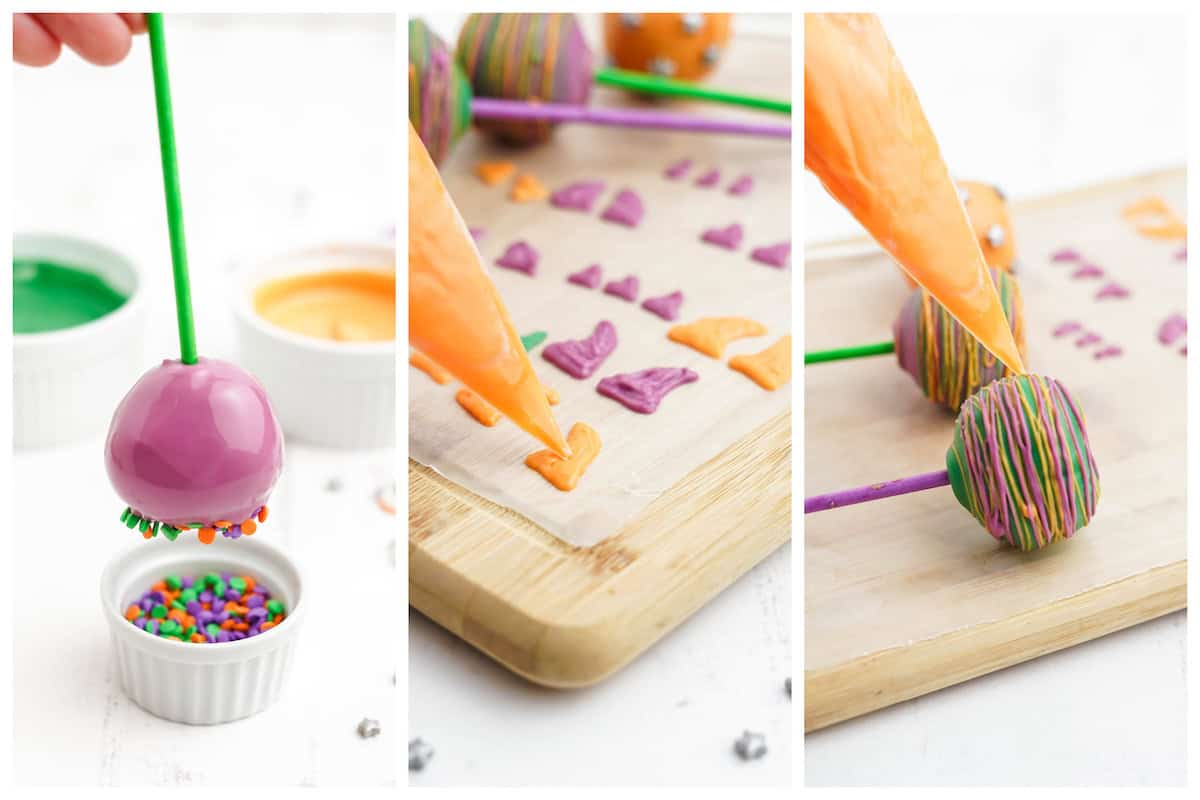
- DECORATE. Add sprinkles, drizzle, or candy eyes and let everything set before serving.
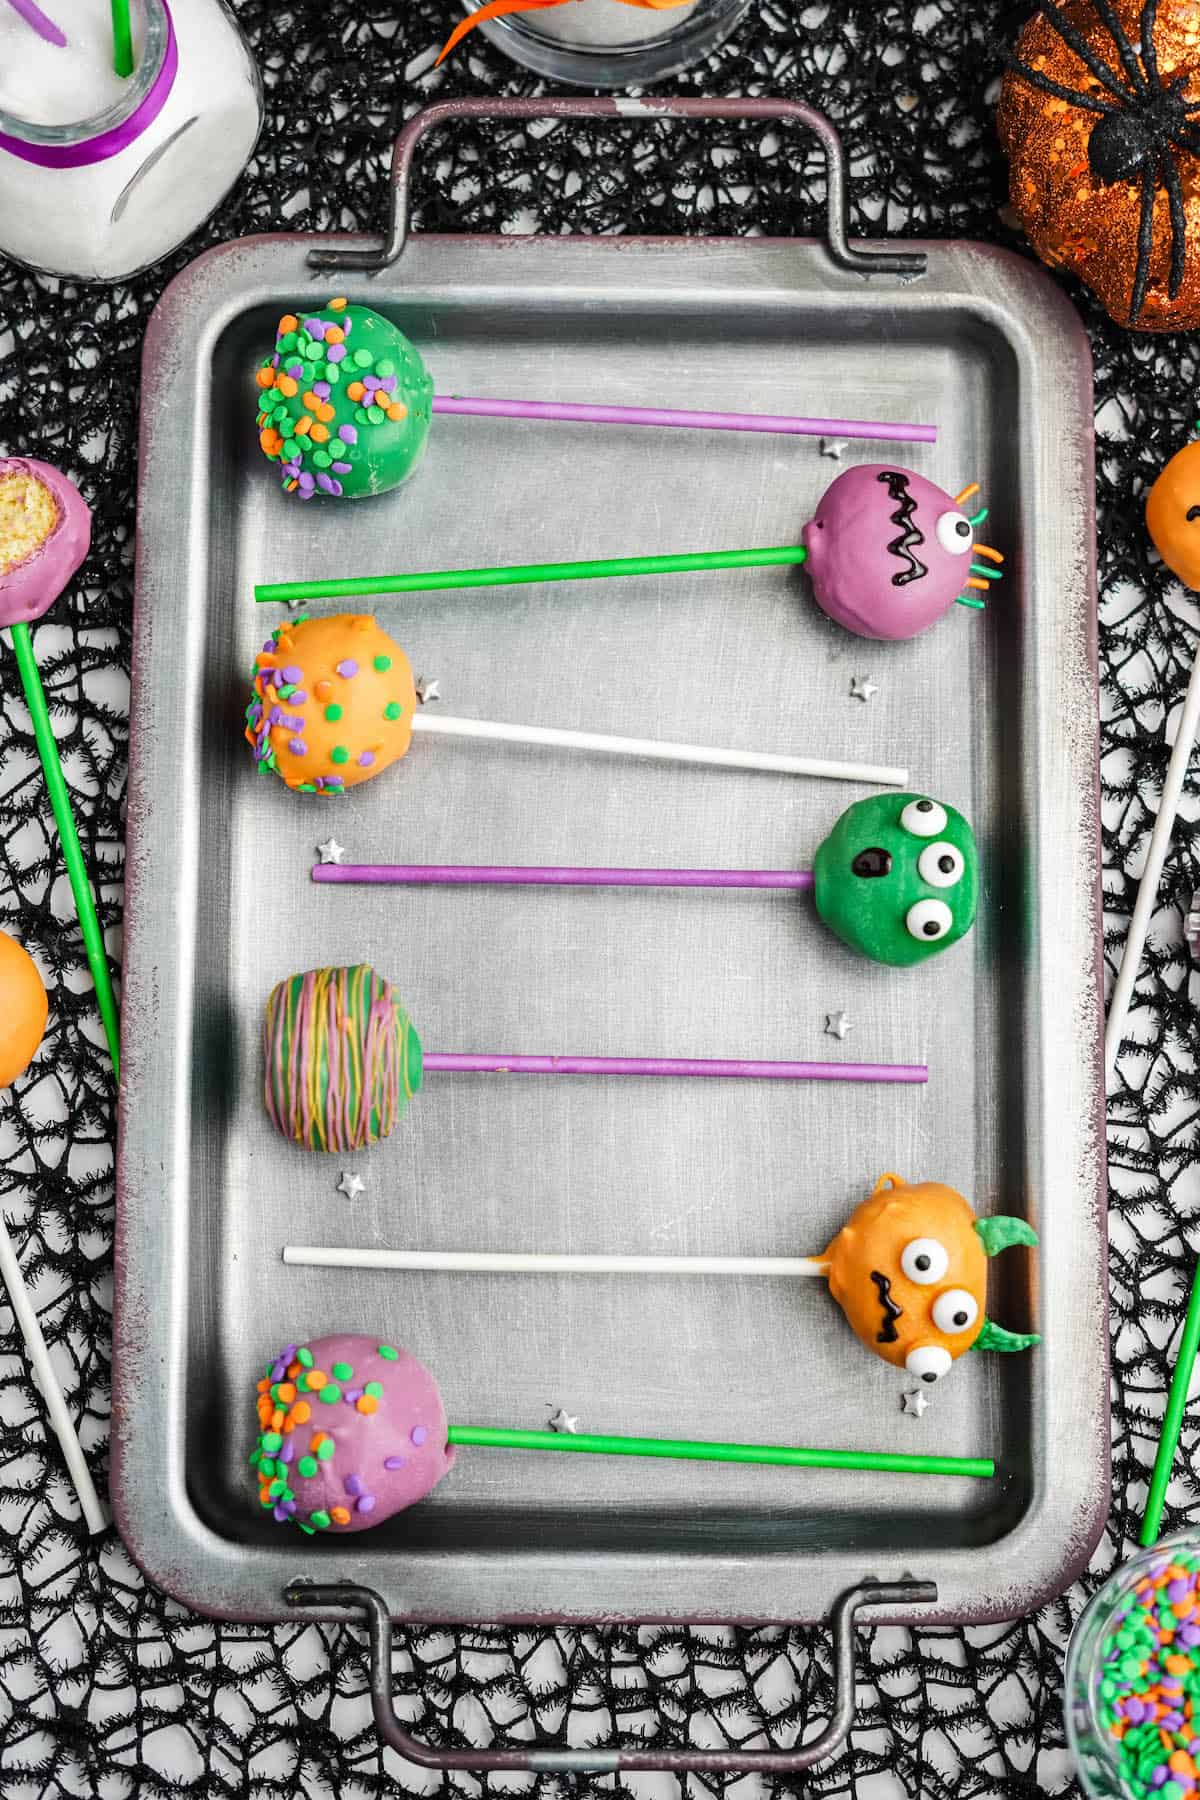
Decorating Ideas For Halloween Cake Pops
- MONSTER POPS – Add candy eyes, sprinkles, and gel for playful or spooky faces. To add horns to your monster cake pops, pipe horn shapes onto wax paper using melted candy and let them cool. Then, stick them onto pops with more melted candy. (Tip: A sprinkle behind a big horn makes a great little brace.)
- CANDY CORN STYLE – Dip in white, orange, and yellow layers for a striped look.
- DRIZZLED POPS – Let the base set, then drizzle a second color over the top.
- SPRINKLE-DIPPED – Let the coating set for just 3 minutes before dipping into sprinkles.
- GHOST POPS – Use white coating and keep decorations simple for a clean look.
Home Chef Tips For Halloween Cake Pops
- Steer clear of candy melting wafers with a white film inside the bag. That film will likely show up on your finished pops. Wilton is our go-to brand, but most packages have a little window so you can peek inside before buying.
- If your coating feels thick, stir in a small amount of oil to loosen it. Thick coating can pull the donut off the stick.
- Let each layer cool before adding more decoration. This prevents cracking and sliding.
- Always dip the stick first before inserting it. This is what keeps everything in place.
Make Ahead And Storage
- Make Ahead: Prepare up to 24 hours in advance. Store at room temperature for best results.
- Refrigerate: Not recommended. Candy coating can sweat and develop streaks or cracks.
- Freeze: Not recommended. The coating and texture do not hold up well after freezing.

Halloween Cake Balls FAQ
No. Donut holes are already firm enough to dip right away.
Up to 24 hours ahead. Store at room temperature in an airtight container.
Usually because the stick wasn’t secured with melted coating first.
Yes, but it requires tempering for best results. Candy melts are simpler and more reliable.
Start with sprinkles and candy eyes. They create a finished look without extra effort.

More Foxes Love Lemons Favorites

Halloween Cake Pops
Save This Recipe!
Ingredients
- 1 cup candy melts green, purple and/or orange
- 24 6- to 7-inch lollipop sticks
- 24 plain mini donuts and/or donut holes
- Candy eyeballs, assorted sprinkles and black decorating gel, for decorating
Instructions
- Melt the candy melts according to package directions.
- Carefully dip each lollipop stick about 1/4- to 1/2-inch into the melted candy melts and stick into each donut. Allow to cool upside down (with the donuts on wax paper-covered work surface and the sticks pointing toward the ceiling) for a few minutes until candy melt is hardened.
- Carefully dip each donut into the melted candy melts and rotate it around until it’s fully coated. Again, allow these to cool upside down, on wax paper, until completely hardened.
- Use the candy eyeballs, sprinkles and black writing gel to decorate cake pops as desired (see Notes below) and serve once the candy melts have set.
- These Halloween Cake Pops are best enjoyed the day they are made, but you can make them up to 24 hours in advance. Do not store them in the fridge or freezer. The candy melts may sweat when brought to room temperature, and this can cause cracking and color bleeding. If storing the donut cake pops overnight, store at room temperature in an airtight container.
Notes
Decorating Ideas For Halloween Cake Pops
- MONSTER POPS – Add candy eyes, sprinkles, and gel for playful or spooky faces. To add horns, pipe horn shapes onto wax paper using melted candy and let them cool. Then, stick them onto pops with more melted candy. (Tip: A sprinkle behind a big horn makes a great little brace.)
- CANDY CORN STYLE – Dip in white, orange, and yellow layers for a striped look.
- DRIZZLED POPS – Let the base set, then drizzle a second color over the top.
- SPRINKLE-DIPPED – Let the coating set for just 3 minutes before dipping into sprinkles.
- GHOST POPS – Use white coating and keep decorations simple for a clean look.
