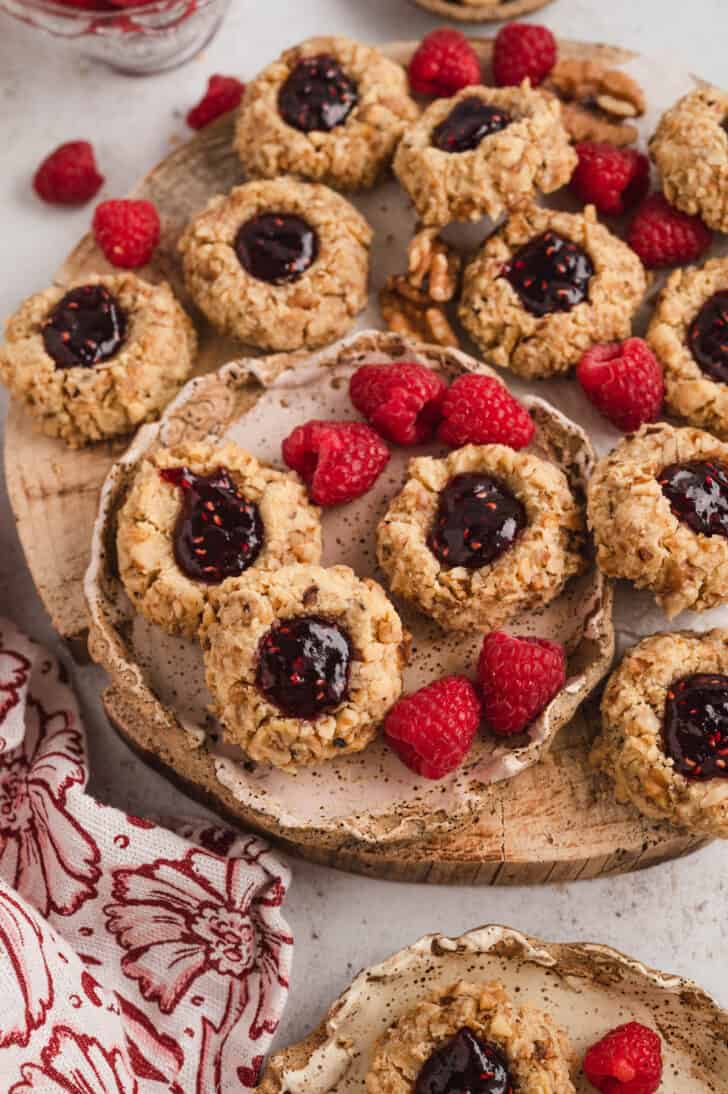
Thumbprint Cookies With Jam
These Thumbprint Cookies With Jam use a simple two-step baking method that prevents cracking and keeps the centers neat. Learn exactly when to add the jam, why shortening works best, and how to get soft, tender cookies every time.

Save This Recipe!
Perfect Thumbprint Cookies With Jam Every Time
These thumbprint cookies with jam are soft, slightly crumbly in the best way, and filled with just enough sweet jam to balance the salty, nutty cookie.
But the real reason this recipe works is the technique. Instead of pressing the cookies before baking, we bake them briefly first, then make the indentation and add the jam. This keeps the cookies from cracking and helps them hold their shape.
If you’ve ever had thumbprint cookies spread, split, or turn dry, this method fixes all of that. It’s simple, but it makes a big difference.
Why You Will Love This Recipe For Thumbprint Cookies
- If you grew up eating thumbprint cookies, there’s a good chance this recipe is very similar to your grandma’s or mom’s. Nostalgic comfort!
- The two-step baking method keeps the cookies from cracking and helps them stay thick and tender.
- The dough uses shortening for a soft, melt-in-your-mouth texture (in this instance, butter just isn’t the same).
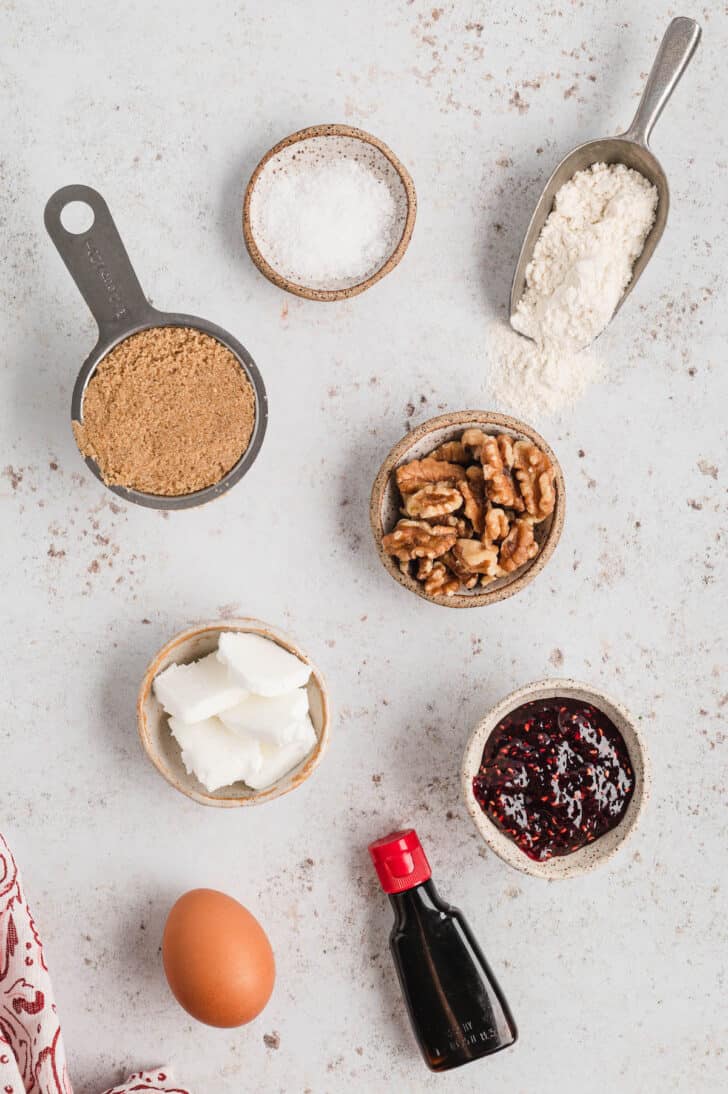
Thumbprint Cookies Recipe With Jam Ingredients
A full recipe card, including exact ingredient amounts, appears at the bottom of this post.
- flour – provides structure for these nutty thumbprint cookies, but we mix just until combined to keep the cookies tender, not tough.
- kosher salt – this recipe for thumbprint cookies makes intentionally salty cookies to balance the sweetness of the jam.
- eggs – the yolks enrich the dough for these classic thumbprint cookies, while the whites are used to help the walnuts stick.
- vegetable shortening – yes, Crisco. We very rarely use it, but this is key for that soft, delicate texture. We love a buttery cookie, but butter isn’t the right choice here – it would spread more and create a crisper cookie instead.
- light brown sugar – adds moisture and a subtle molasses flavor that works really well with raspberry jam.
- vanilla – rounds everything out and adds warmth.
- walnuts – give texture and help protect the outside of the cookie during baking so they don’t spread too much.
- raspberry jam or preserves – slightly tart jam works best to balance the richness of the cookie. Strawberry preserves, blueberry jam or apricot jam are also great here.
How To Make Easy Thumbprint Cookies
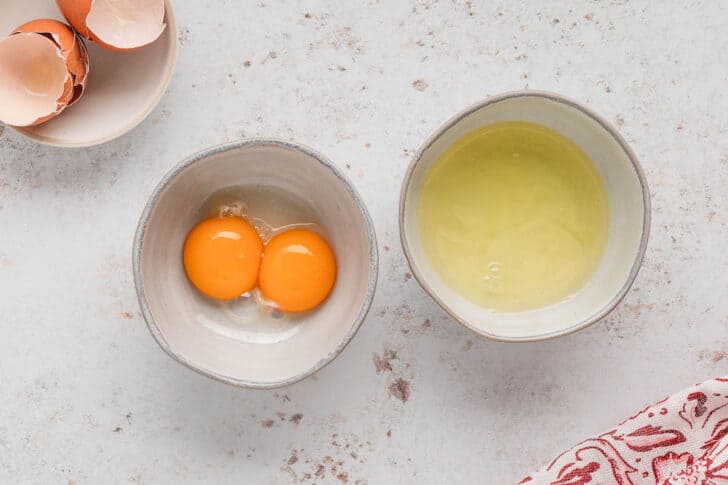
- PREP. Whisk together flour and salt and line baking pans with parchment. Divide the eggs so that the whites and the yolks are in two separate small bowls.

- MIX. Beat egg yolks, shortening, brown sugar and vanilla in a large bowl with an electric mixer until light and fluffy, scraping down the sides of the bowl as needed.

- COMBINE. Add dry ingredients and mix just until combined. No chilling needed for this recipe.

- SHAPE. Roll the cookie dough into 1-inch balls and place them on the prepared pans. Use the warmth of your palms to help press and form the balls together.

- COAT. Place the walnuts in a medium bowl. One at a time, dip each dough ball into the egg whites, allowing the excess to drip off before rolling the dough ball in the walnuts. Use your hands to gently press the walnuts onto the dough balls. Place dough balls back on the prepared baking sheet.

- FIRST BAKE, INDENT, JAM. Transfer the balls to the oven and bake 5 minutes to set the structure. Remove the balls from the oven and gently make an indent in each cookie using your thumb. Fill each well with about a half teaspoon of jam.

- FINISH BAKE AND COOL. Return the thumbprints to the oven and bake until the bottoms are light golden brown. They will be very soft when they come out of the oven, but do not overbake them. Transfer the pans to a cooling rack and allow the cookies to cool completely before serving. They will firm up as they cool.

Thumbprint Jelly Cookies Home Chef Tips
- If the dough feels sandy, that’s correct. Pressing it in your hands warms the fat and helps it come together smoothly.
- If evenly sized cookies are important to you, and you have a kitchen scale, feel free to scale the dough. As noted in the recipe card below, each dough ball should be 22g, before rolling in nuts.
- Don’t skip the first bake. This is what prevents cracks and helps these easy thumbprint cookies hold their shape.
- Use a thicker jam or preserves. A thin jam filling can bubble over and make the centers messy.
- Watch the bottoms, not the tops, for doneness. These stay pale but should be lightly golden underneath.

Make Ahead And Storage
- Make Ahead: Prepare and shape the dough balls, then transfer to an airtight container and refrigerate up to 2 days before baking.
- Storage: Store baked cookies in an airtight container on the counter at room temperature up to 1 week – perfect for the holiday season!
- Freeze: Freeze baked cookies in a single layer, then transfer to an airtight container and freeze up to 3 months. Thaw at room temperature.

FAQ
For best results, partially bake the cookies first, then add the jam and finish baking. This helps prevent cracking and keeps the centers neat.
Cracking usually happens when the dough is pressed before baking. Baking briefly first helps set the structure so the cookies don’t split.
Thicker jams or preserves work best. Raspberry is classic because its tartness balances the rich cookie.
Overmixing or too-warm dough can cause spreading. Mix just until combined and make sure your dough isn’t overly soft.
More Foxes Love Lemons Favorites

Thumbprint Cookies With Jam
Save This Recipe!
Ingredients
- 2 cups all-purpose flour
- 1 teaspoon kosher salt
- 2 large eggs at room temperature
- 1 cup vegetable shortening at room temperature
- ½ cup packed light brown sugar
- 1 teaspoon vanilla extract
- 1 cup finely chopped walnuts about 4 ounces
- ¼ cup raspberry jam or preserves
Instructions
- In medium bowl, whisk together flour and salt and set aside. Line 2 rimmed baking pans with parchment paper.
- Divide eggs so that whites and yolks are in two separate small bowls.
- Add yolks to bowl of stand mixer fitted with paddle attachment. Add shortening, brown sugar and vanilla to mixer bowl.
- Beat at medium speed 2 minutes or until mixture is light and fluffy, scraping down sides of bowl as needed.
- Add flour mixture to mixer bowl and mix on low until just combined, scraping down sides of bowl as needed.
- Preheat oven to 300 degrees F. Roll dough into 1-inch balls (about 22g of dough each if you want to scale them) and place on prepared pans. The dough will be very sandy – this is what gives the final cookies their melt-in-your-mouth texture. Press the dough back and forth between your hands a few times to warm it up before rolling gently.
- Place walnuts in medium bowl. One at a time, dip each dough ball into egg whites, allowing excess to drip off before rolling dough ball in walnuts. Use your hands to gently press walnuts onto the dough balls. Place dough balls back on prepared pans, 1 inch apart.
- Transfer to oven and bake 5 minutes.
- Remove cookies from oven. While holding outside of cookie balls gently with one hand, use the thumb of your other hand to make an indent in the middle of each cookie. You may need to slightly reshape the outside of the cookie after you do this; this is normal. Fill each well with 1/2 teaspoon jam.
- Return to oven and bake 10 to 12 minutes or until bottoms are light golden brown. They will be very soft when they come out of the oven. Do not overbake. Transfer pans to cooling rack and allow cookies to cool completely on pans before serving.
