Red White And Blue Ice Cream Cake
A Red White And Blue Ice Cream Cake that actually holds its shape. Built with smart layering, make-ahead timing, and tested shortcuts so you avoid melting, uneven layers, and messy slices.
Save This Recipe!
Make-Ahead Red White And Blue Ice Cream Cake That Won’t Melt Fast
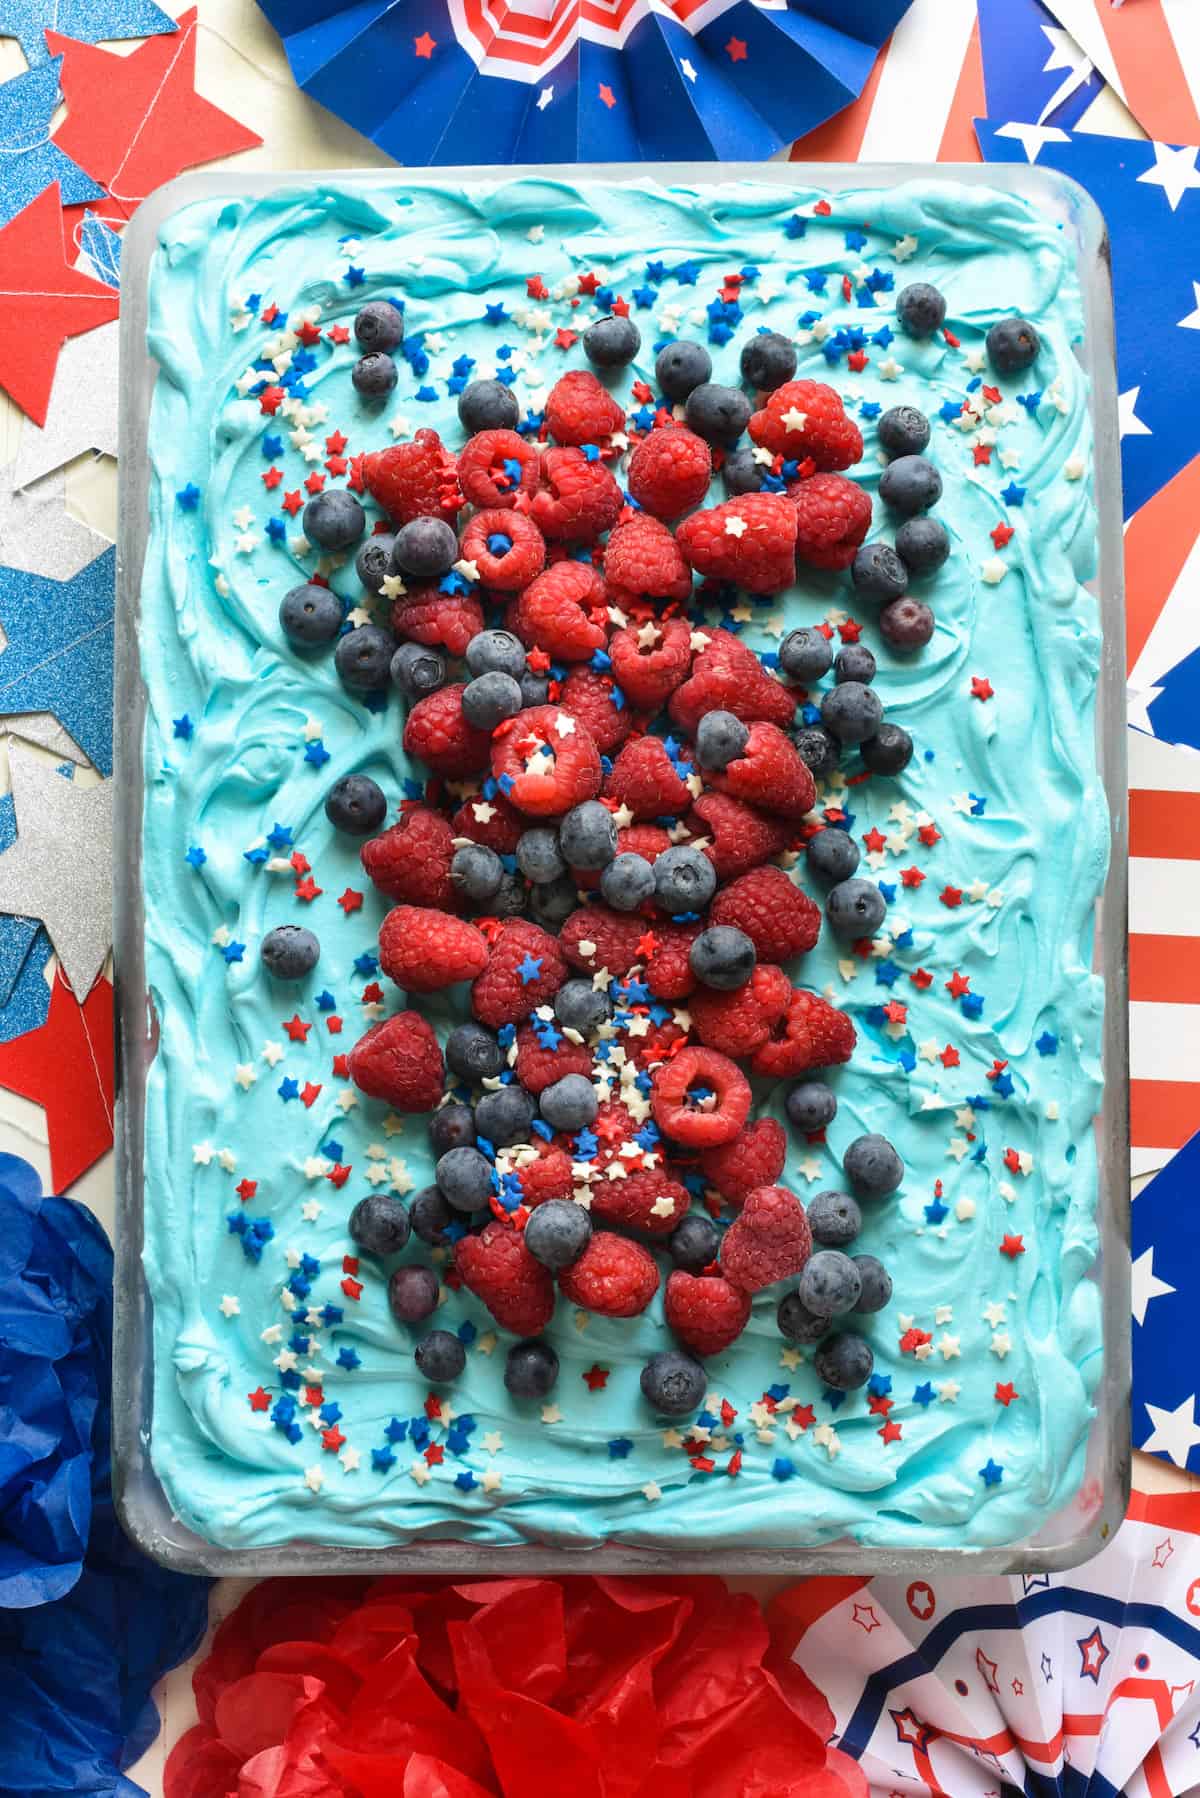
If you need a 4th of July, Memorial Day or Labor Day dessert that looks impressive but doesn’t require turning your kitchen into a bakery, this red white and blue ice cream cake is it.
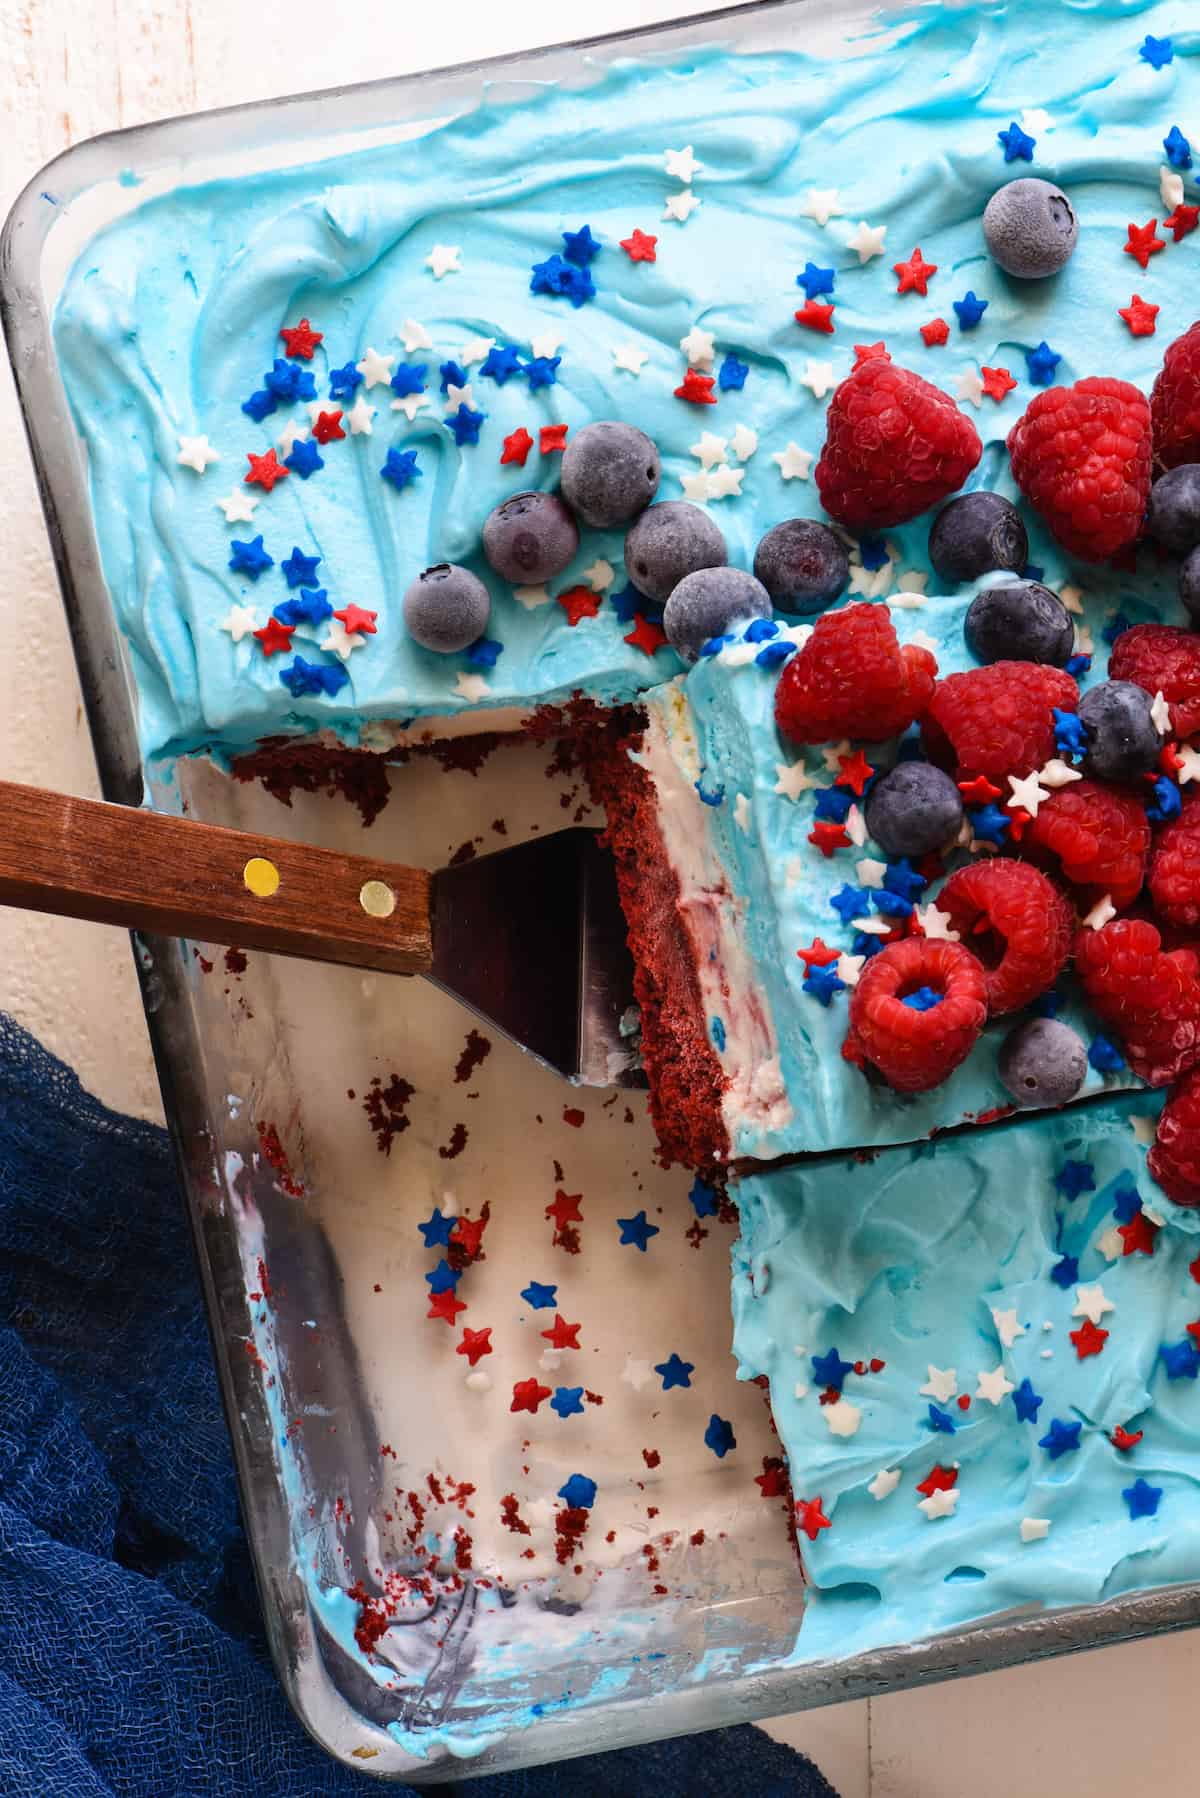
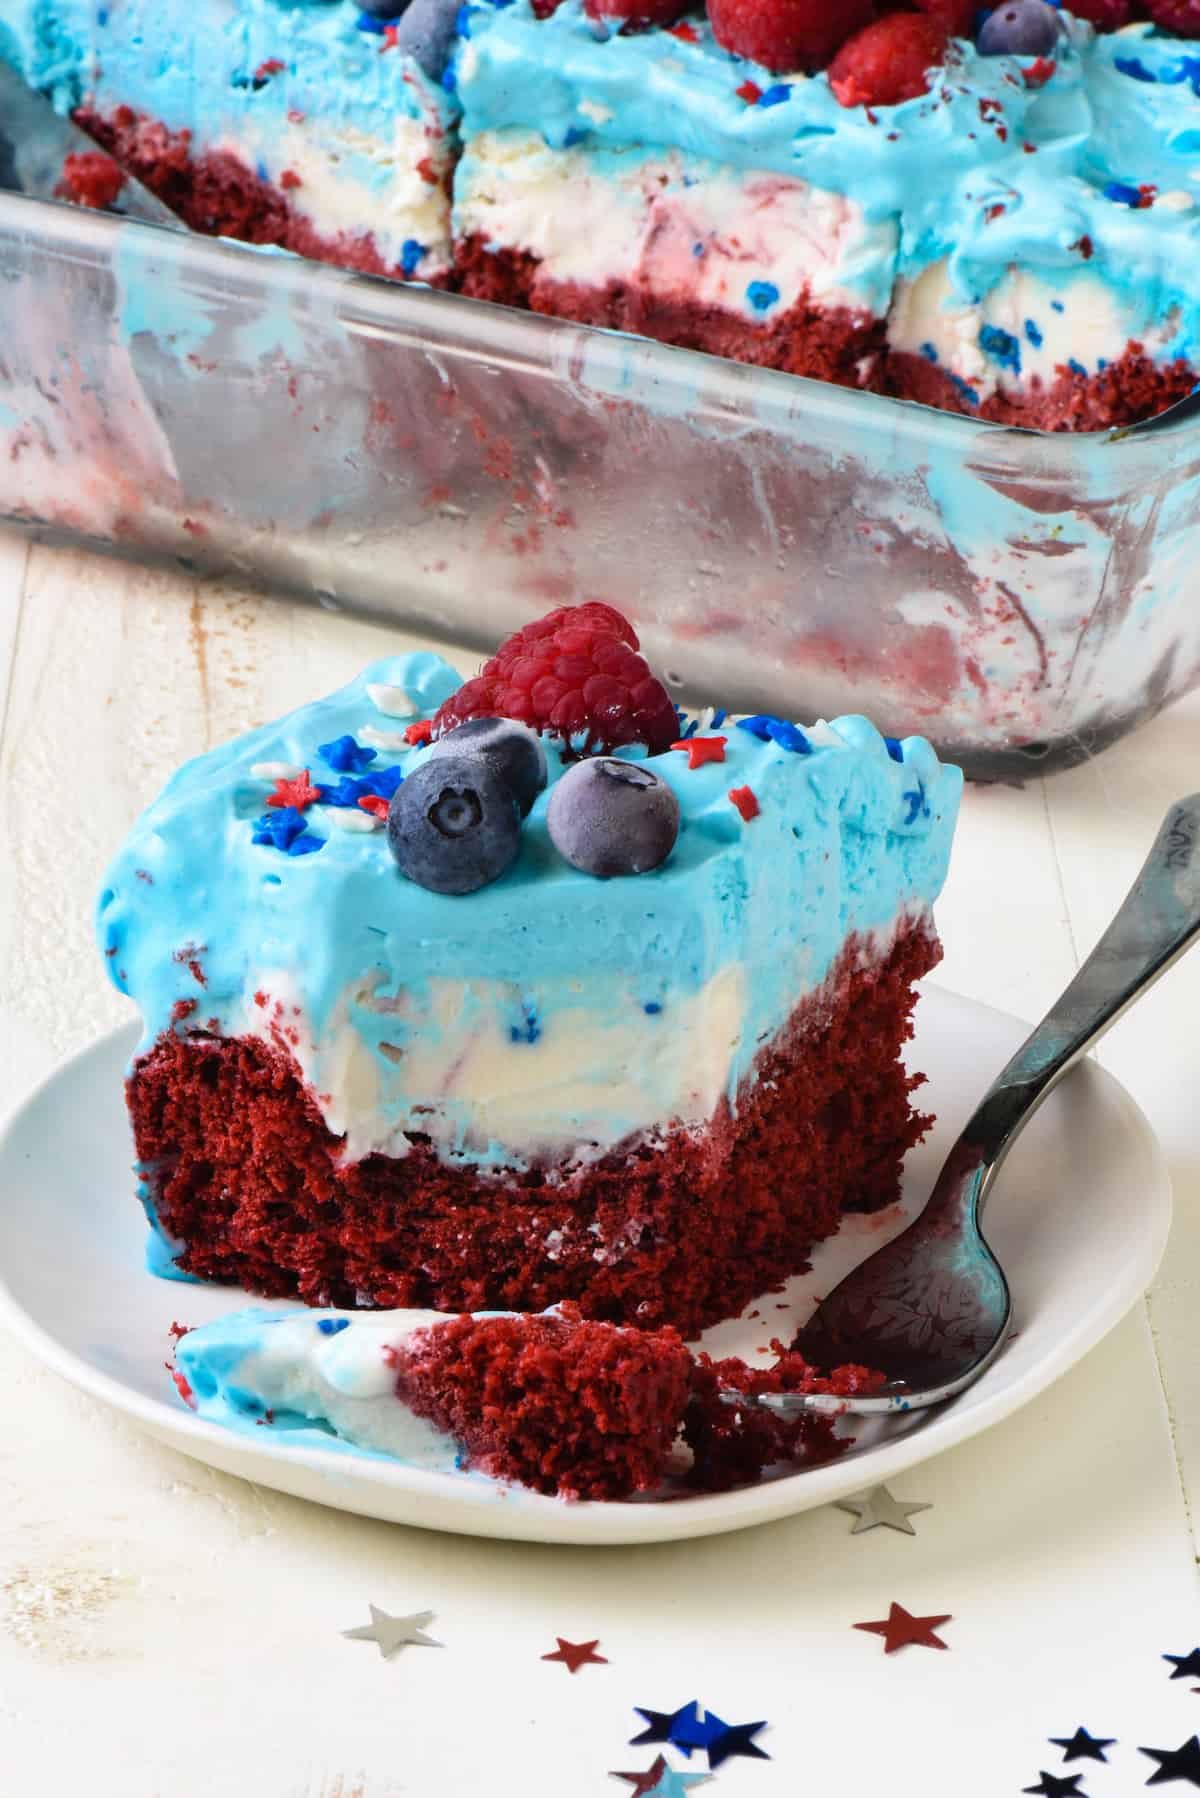
It’s built with a simple red velvet cake base, a thick layer of softened ice cream, and a cloud of homemade whipped cream on top. The key is not just what goes into it, but how you layer and freeze it, so you get clean slices instead of a melty mess
This is one of those desserts that feels like you tried really hard. In reality, you used a few smart shortcuts and let the freezer do most of the work.
Why You Will Love This Red White And Blue Cake
- It’s designed for clean slices. Strategic tricks like freezing between layers make all the difference.
- An easy recipe that uses smart shortcuts like boxed cake and store-bought ice cream, while still tasting homemade.
- Completely make-ahead friendly, which is exactly what you want for a summer party.
4th Of July Ice Cream Cake Ingredients
A full recipe card, including exact ingredient amounts, appears at the bottom of this post.
- red velvet cake mix – gives you that bold red layer with minimal effort. We’ve tested from-scratch versions, but honestly, boxed keeps this perfect dessert stress-free and consistent.
- blue ice cream – here in the Midwest, that means Blue Moon, a flavor that kids and adults alike can love! Elsewhere, you might find Blue Monster, which may have mix-ins like cookies, which is totally fine.
- heavy cream – creates a soft, sliceable topping that’s lighter than frosting and freezes beautifully.
- powdered sugar – sweetens the whipped cream.
- vanilla extract – rounds out the flavor so the whipped cream doesn’t taste flat.
- blue food coloring – a gel food coloring gives you that patriotic blue finish without watering down the cream, and is highly recommended over liquid food coloring.
- berries or sprinkles – optional, but they add texture and make the whole thing look finished.
How To Make This Red White And Blue Cake Recipe
- BAKE. Prepare the cake mix in a 9 x 13-inch pan according to package directions. Cool completely, then freeze at least 1 hour.
- LAYER. Let the ice cream soften until spreadable, then spread evenly over the frozen cake. Freeze again until firm.
- WHIP. In a large bowl or stand mixer, beat the cream until soft peaks form (do not let it get all the way to stiff peaks), add the sugar, then continue beating to medium peaks. Mix in the vanilla and food coloring.
- TOP. Spread the whipped cream mixture over the ice cream layer in an even layer. Freeze again until fully set.
- SERVE. After it’s fully frozen, allow the cake to sit at room temperature for 5 minutes for easier slicing. Decorate with berries or sprinkles, slice, and serve.
4th Of July Ice Cream Cake Home Chef Tips
- Freeze between every layer. This is the difference between clean layers and a blended mess.
- Slightly soften ice cream, don’t melt it. You want spreadable, not pourable.
- Use an offset spatula if you have one. It makes smoothing the layers way easier.
- Dip your knife in hot water before slicing for cleaner cuts of this perfect patriotic dessert.
Make Ahead And Storage
- Make Ahead: Assemble the full cake up to 3 days in advance. Keep tightly covered in the freezer until ready to serve on the Fourth of July!
- Refrigerate: Not recommended. This dessert needs to stay frozen to maintain structure.
- Freeze: Store tightly wrapped in the freezer up to 1 week. After that, texture begins to degrade slightly.
FAQ
Work in stages and freeze between each layer. Don’t try to assemble everything at once.
Absolutely. Skip the coloring in the whipped cream and let the berries and ice cream provide the color for this festive red white and blue treat.
About 5 minutes at room temperature is perfect for clean cuts.
More Foxes Love Lemons Favorites

Red White And Blue Ice Cream Cake
Save This Recipe!
Ingredients
- 1 box red velvet cake mix 13 to 15 ounces
- 1 carton blue ice cream 48 ounces
- 2 cups heavy whipping cream
- 1 cup powdered sugar
- 1 teaspoon blue gel food coloring
- ½ teaspoon vanilla extract
- Blueberries, raspberries and/or sprinkles, for decorating (optional)
Instructions
- Prepare cake mix in 13 x 9-inch pan per package instructions. Allow to cool to room temperature completely, then cover and freeze at least 1 hour.
- Allow ice cream to sit at room temperature 20 to 25 minutes or until soft and spreadable. Spread ice cream in even layer over cake. Cover and freeze at least 1 hour.
- Place cream in bowl of stand mixer fitted with whisk attachment. Whip at medium-high speed until soft peaks form. Reduce speed to low and gradually add powdered sugar until all sugar is incorporated. Increase speed to medium-high and continue whipping until medium peaks form. Add food coloring and vanilla and mix until well combined.
- Spread whipped cream in even layer over ice cream. Cover and freeze at least 1 hour.
- After it's fully frozen, allow the cake to sit at room temperature for 5 minutes for easier slicing. Decorate with berries or sprinkles, slice, and serve.
